|
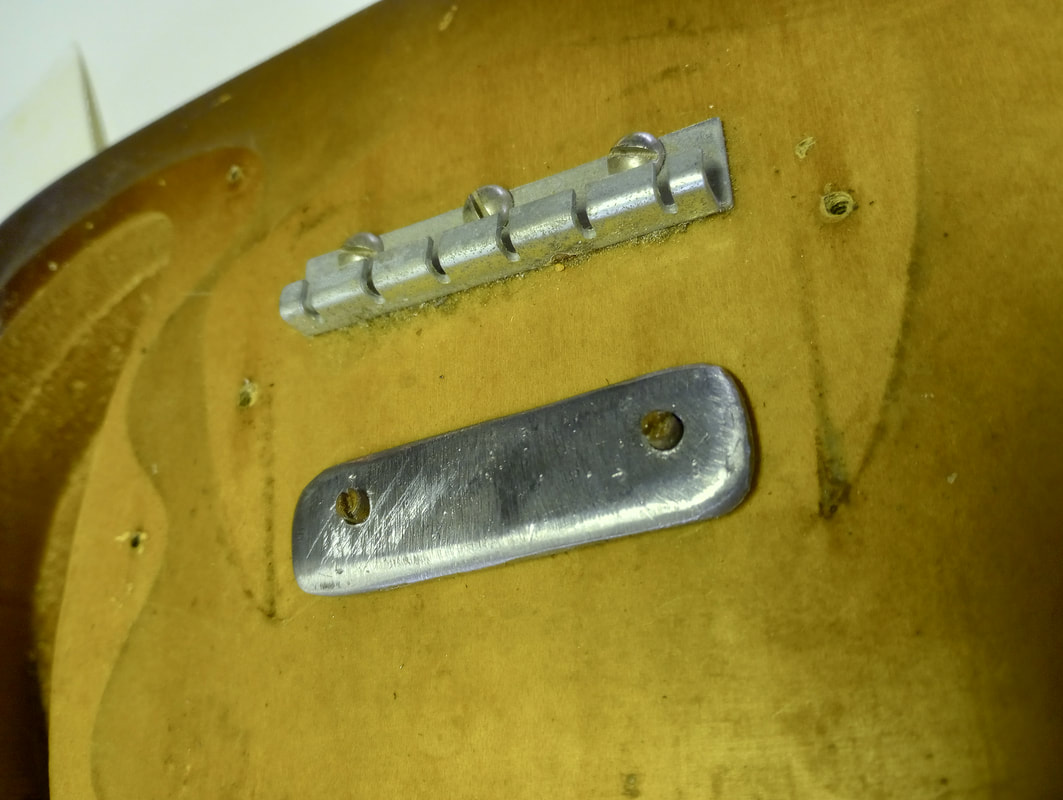
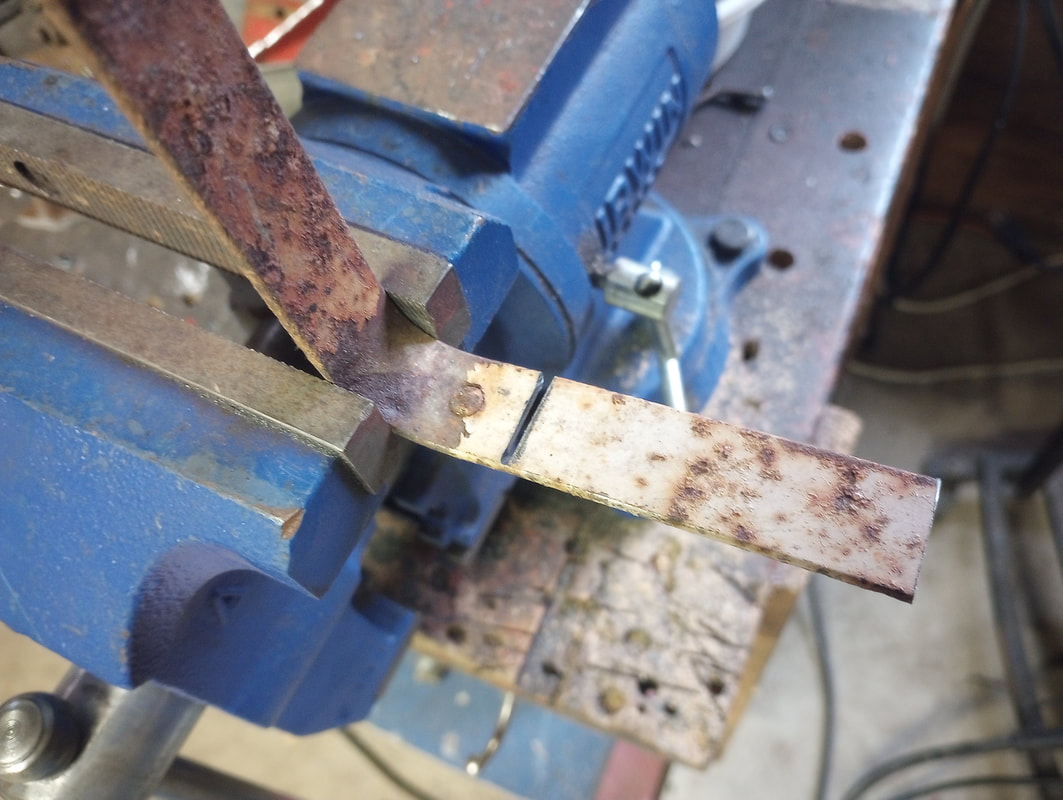
It's the weekend, so I've had time to work on that old Kay guitar that fell into my lap. I've learned that it's a Vanguard K100 model. The "T" logo on the headstock indicates it was made between 1961 and 1965. I found a picture of this model in a 1962 Kay catalog. The list price was $59.95 (about $590 in 2023 dollars). I don't have a complete knowledge, but I know you can get a lot more guitar for that money today than you could in the early 1960s. Go into a music store and play a new Epiphone SG or a Squier Telecaster. This Kay may turn out to be playable, but I guarantee you it isn't as playable as those. 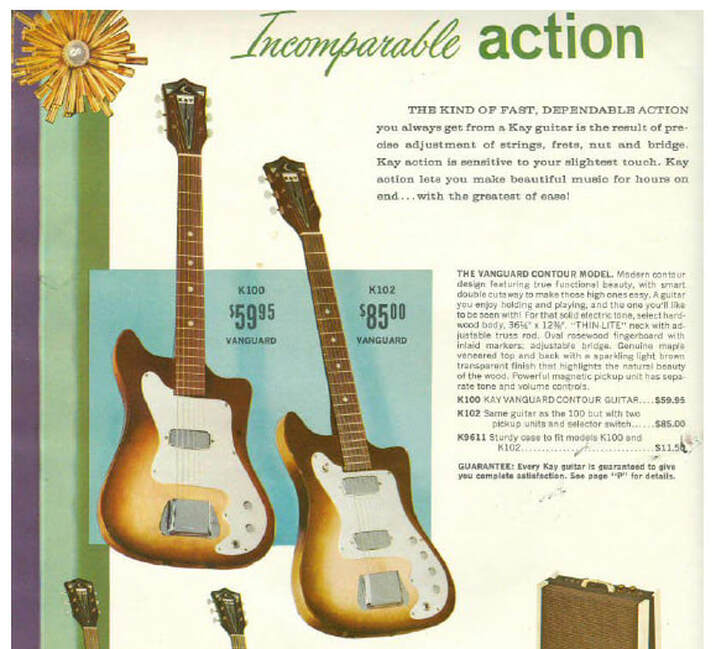 The first things I needed to address were the nut and the bridge. I joined a Kay guitars group on Facebook and posted about needing measurements for the missing nut. Someone was kind enough to measure the nut on their Vanguard K102 (thanks Travis!) and I was able to find a bone nut on Amazon that looked like it would work. I ordered a package of four for $13, thinking I would have extras if I messed one up and also thinking I might be able to use one to make a new bridge. The nut fit fine after I shaved a bit off the back with my angle grinder. I haven't glued it in yet because I'm going to refinish the body and headstock. 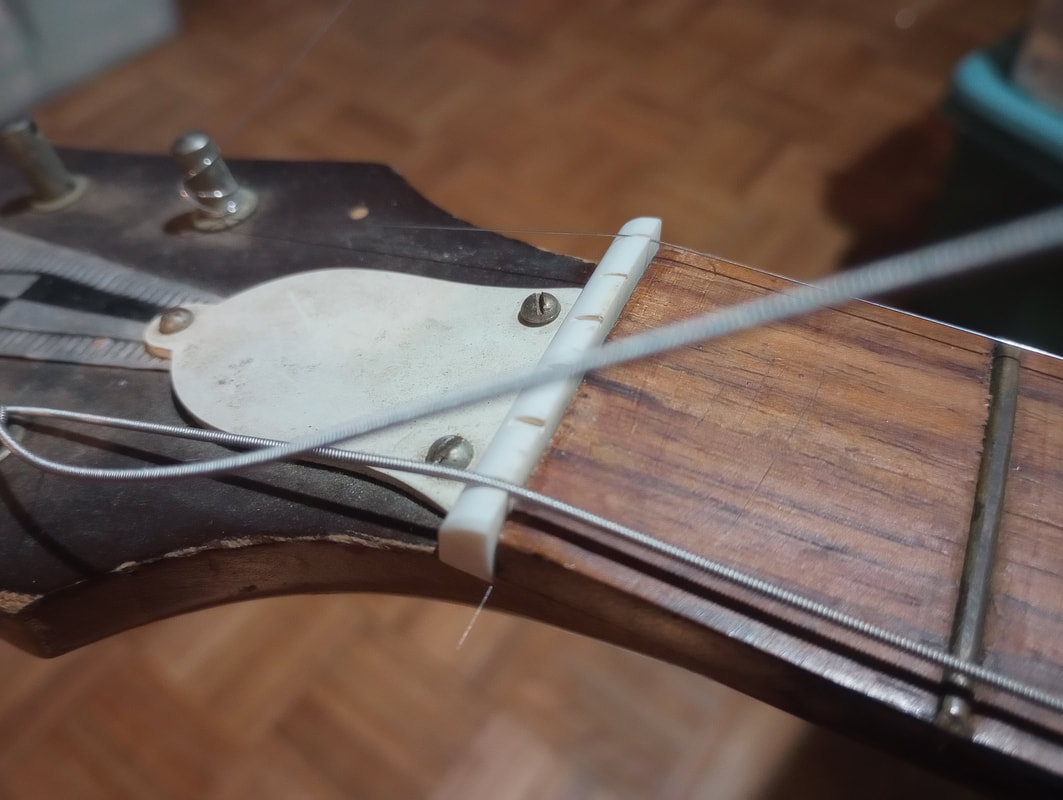 Addressing the bridge was more complicated. The extra nuts were way too short to be of any use (I had not anticipated the string spacing would be so much larger at the bridge than at the nut). Plan B was to shape a piece of metal that would fit on the existing bridge posts, then attach something to that for the string rests. I used an old piece of some kind of bracket I had lying around. I cut the length a bit too short but it ended up working fine as a temporary support. I ground off the rust and drilled the holes using the original bridge as a guide.
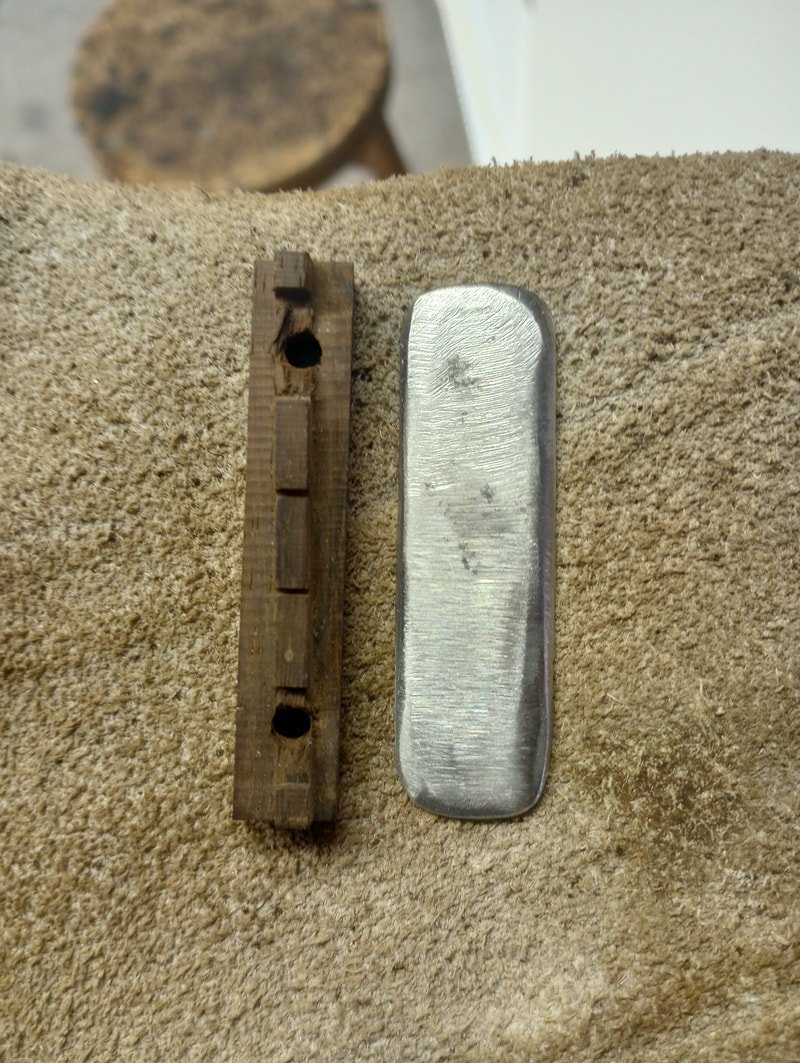
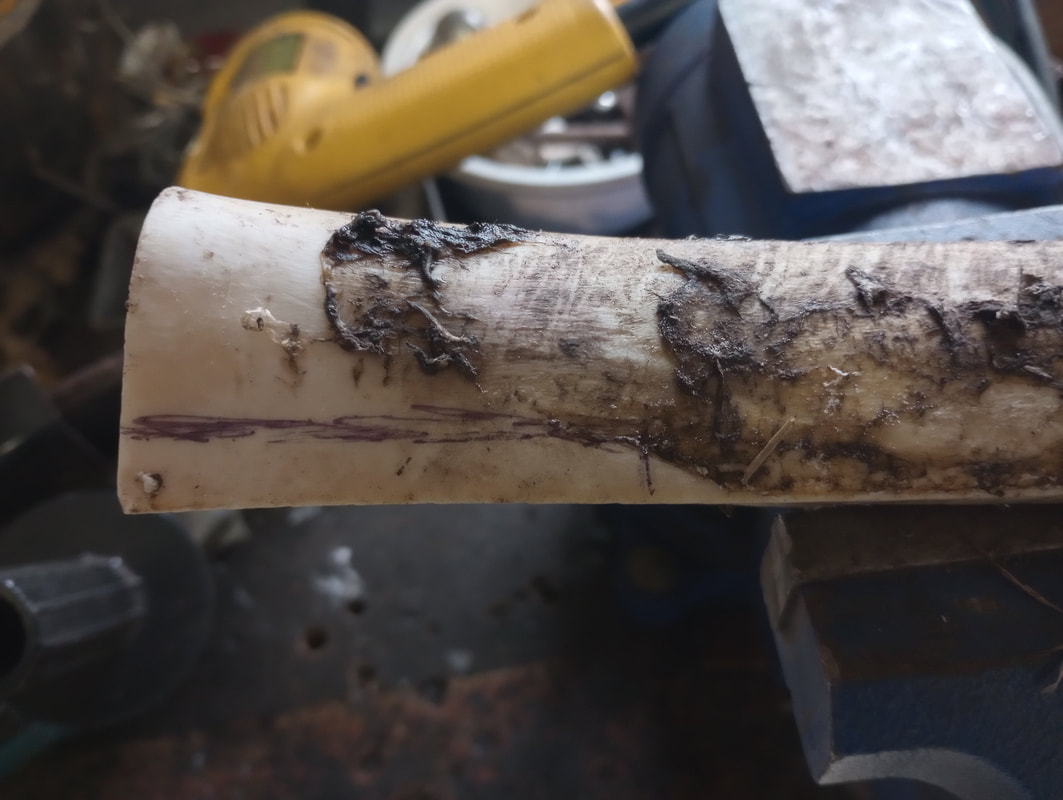
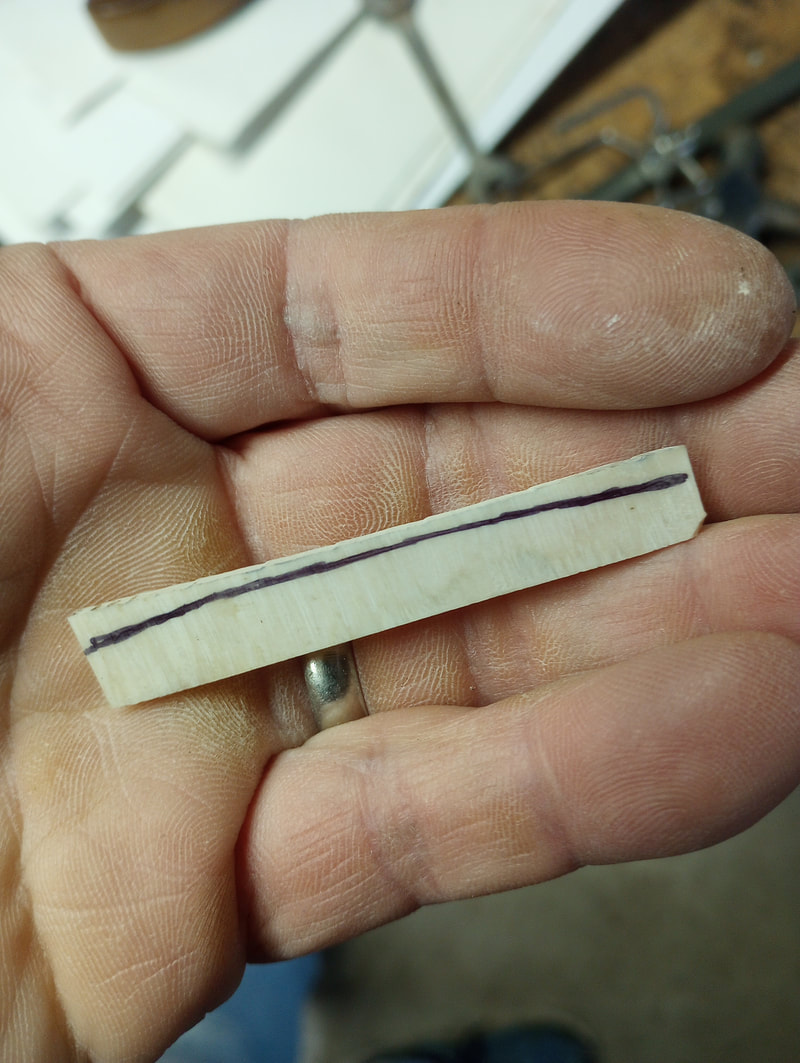
 New bridge base on the original posts. If I had started with a thicker piece of metal the posts would not have penetrated. That would have been better. But this one is only temporary anyway. Just this morning I happened to find a big piece of cow bone out in the yard, presumably dragged there by a dog or coyote. Sometimes I'm actually lucky. I cut a slab out of the cow bone and smoothed it down so it approximately matched the length of the bridge and was about the right height. I had to scoop out some divots for the tops of the posts to go into. Knowing this wasn't the final bridge, I used a file to put some quick notches in for the strings. I just wanted to get a couple of strings on so I could see what the action and sound were like.
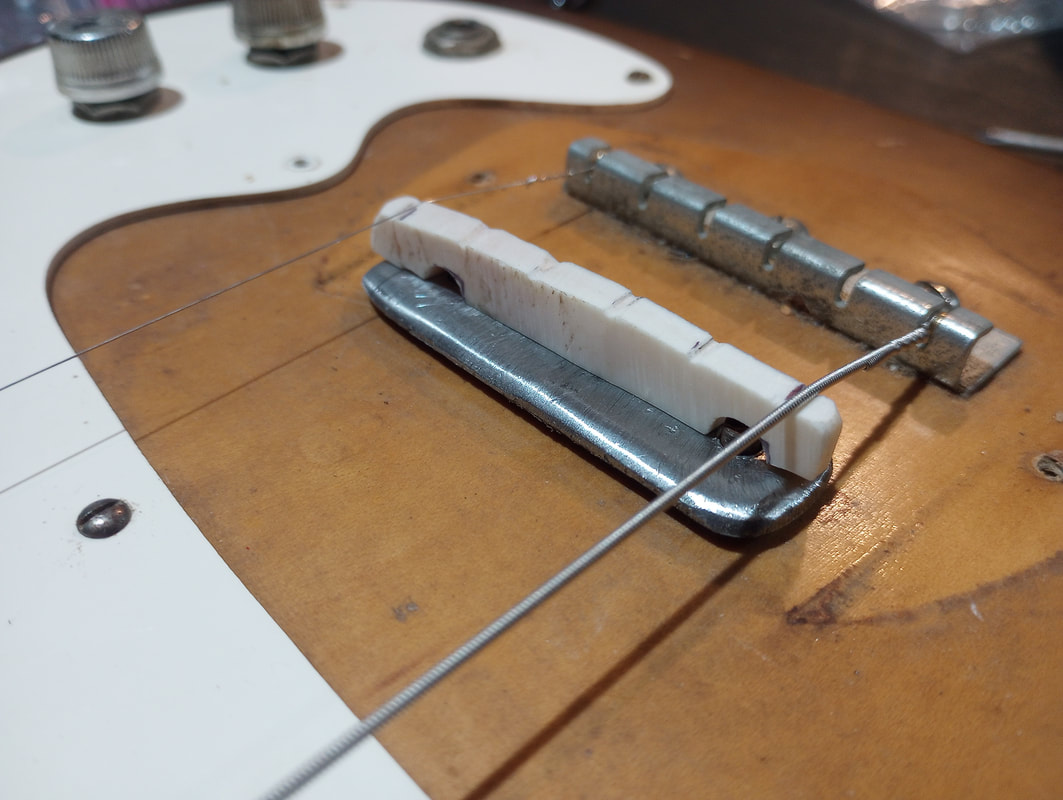 Temporary bridge installed. I put on the low and high E strings. The tuners really suck but maybe they'll be usable if I clean and lubricate them. There was tons of noise coming from the electronics and the knobs didn't seem to be very functional. I could get things to quiet down a lot by shifting the guitar around and wiggling the cord, so I'm guessing replacing the input jack might address a lot of the noise issues. I've ordered a new jack. I've also ordered some bone blanks made for acoustic guitar bridge saddles. They are big enough that I can build a bridge matching the original in size. And hopefully it will look a lot cleaner than my metal base and be sturdier than making something using two different materials.
0 Comments
Leave a Reply. |
Archives
April 2023
Categories |
 RSS Feed